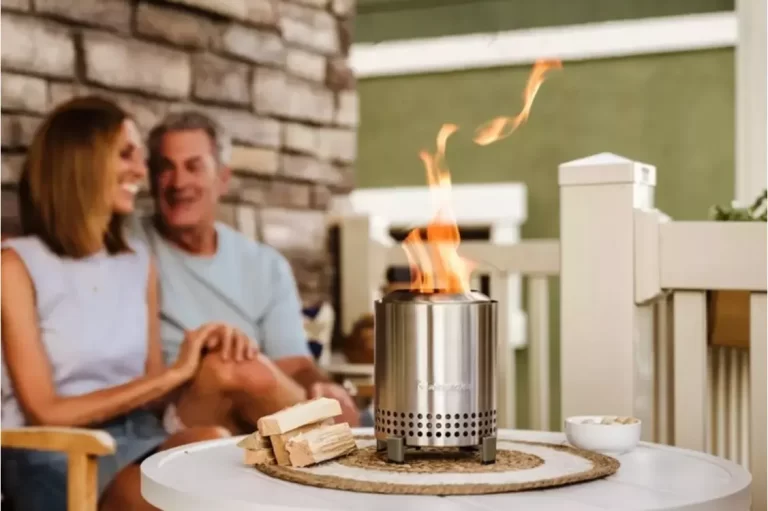
A clean Solo Stove is essential for a safe and efficient outdoor fire experience. This portable fire pit has become a favorite among campers, backyard enthusiasts, and those who love spending time outdoors. Regular maintenance not only keeps it looking its best, but it also ensures maximum performance and longevity.
Cleaning a Solo Stove may seem like a daunting task, but, with the right tools and techniques, it can be simple and efficient. The cleaning process involves waiting for the stove to cool, removing the ashes, and cleaning the outer surface. Proper care and maintenance will keep your Solo Stove in top-notch condition, allowing you to enjoy countless hours of cozy fires and warm ambiance.

Understanding Your Solo Stove
A Solo Stove is an efficient and easy-to-use device designed for cooking and heating purposes during outdoor activities such as camping and hiking. Knowing how to clean and maintain your Solo Stove properly is essential for optimal performance and long-lasting use.
The Solo Stove operates by utilizing a well-designed air intake system, allowing air to flow through the vents and creating a more efficient burning process. It results in less smoke, faster heating times, and less fuel consumption. Cleaning these air vents and removing ash residue is crucial for maintaining efficient airflow.
Before cleaning your Solo Stove, it’s important to inspect it for any signs of damage or wear and tear. Check for cracks, holes, or broken parts, and replace them before proceeding with the cleaning process. Be sure to disassemble the stove by removing all parts, including the fuel tank, and set them aside.
Using a soft-bristled brush, gently loosen any stuck pieces of ash from the air vents, focusing on the bottom area where most of the soot accumulates. A small portable shop vacuum, like this one from Armor All, can be helpful for cleaning out any remaining soot and ash from the vents. Ensure that all parts of the stove are thoroughly cleaned, including the fuel tank area.
For a deeper cleaning, consider using a soft brush drill attachment along with a gentle cleaning agent such as Bar Keepers Friend, as suggested by Dr. Hiker. Wet the inner side of the stove before applying the cleaning agent and scrubbing away any stubborn residue. Rinse the stove thoroughly and allow it to dry before reassembling and using it again.
By regularly cleaning and inspecting your Solo Stove, you’ll ensure its efficiency and longevity, allowing you to enjoy your outdoor cooking experiences without any issues.
Pre-Cleaning Preparations
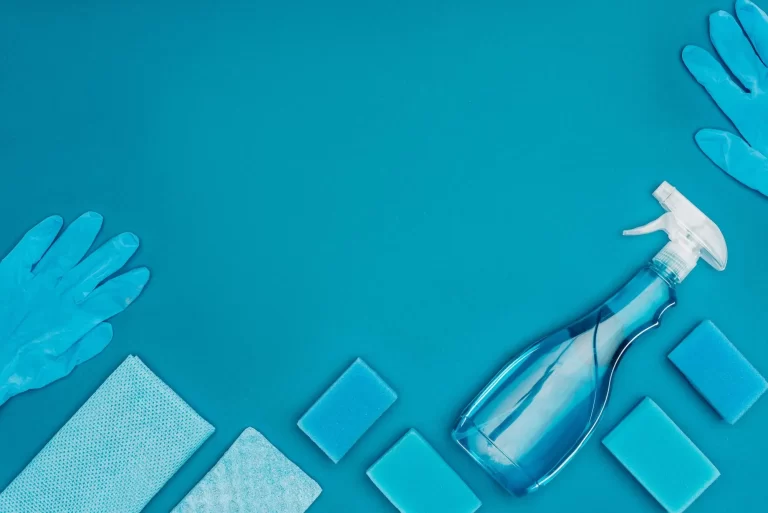
Before you start cleaning your Solo Stove, gather some essential supplies. These include a soft cloth or sponge, and mild soap. Also, make sure you have a bucket or container filled with warm water handy.
Find a suitable work area to clean your Solo Stove. Ensure the space has proper ventilation, and the stove has completely cooled down before attempting any cleaning. Consider using protective gloves to safeguard your hands during the cleaning process.
It’s not always necessary, but depending on the stove’s condition, you may need to dismantle certain parts for thorough cleaning. Consult your specific stove’s manual for guidance on disassembly and reassembly.
Removing ash from your Solo Stove is crucial before starting any cleaning. A vacuum cleaner with a hose attachment can be useful to remove any residual ash from the stove. However, make sure the ash is cool before using a vacuum to avoid potential damage to the device.
Lastly, prepare a clean, dry cloth for wiping down your stove and ensuring no ash residue remains after cleaning.
Gathering Cleaning Supplies
When it comes to cleaning your Solo Stove, having the right cleaning supplies at hand is essential. First, ensure you have a soft brush drill attachment to help remove residue stuck inside the stove. This type of brush is gentle enough to prevent scratching the stainless steel surface.
Next, you’ll need a cleaning agent, like Bar Keepers Friend, to efficiently break down any stubborn stains or soot. This product is non-abrasive and safe to use on stainless steel surfaces.
Additionally, gather a bucket of warm soapy water and a soft cloth or sponge for wiping down the exterior of the stove. A soft bristle brush can also come in handy when you need to clean hard-to-reach areas.
Finally, ensure you have plenty of fresh water for rinsing the stove after cleaning. It’s important to remove any soap or cleaning product residue to prevent damage to the stove’s surface.
With these cleaning supplies in hand, you’re well-prepared to clean and maintain the longevity of your Solo Stove effectively.
Soaking the Stove
Before starting the cleaning process, ensure that your Solo Stove is cool enough to handle. Begin by emptying the ash from the stove by turning it upside down.
Now that the stove is free from ash, it’s time to prepare it for soaking. Fill a large container or sink with warm water, making sure it’s big enough to submerge the entire Solo Stove. Optionally, you can add a mild dish soap solution to the water, which helps break down any remaining residue.
Carefully place your Solo Stove in the water, ensuring that it is fully submerged. Let it soak for about 30 minutes to an hour, allowing the water and soap solution to loosen any stubborn dirt or grime.
While the stove is soaking, make use of this time to gather some cleaning supplies like a soft cloth, a toothbrush, paper towels, and a brush for crevices. These tools will help you reach all the nooks and crannies of the stove once you begin the cleaning process.
After the soaking is complete, carefully remove the stove from the water and wipe it down with a soft cloth to remove any loose dirt. Utilize the toothbrush and crevice brush to clean any hard-to-reach areas on the stove. If necessary, you can apply a mixture of water and vinegar to the toothbrush for a more effective cleaning solution.
Finally, make sure to thoroughly rinse the stove, either by running it under a tap or by using a hose, ensuring that there is no soap or cleaning solution left on it. It’s vital to let the stove dry completely before using or storing it. Turn it upside down or on its side to aid with draining and drying.
Scrubbing the Stove
Cleaning a Solo Stove doesn’t have to be a difficult task. The first step in scrubbing the stove is to ensure it has completely cooled down. This is crucial for your safety, as Solo Stoves can get very hot.
Once the stove is cool, you can begin the scrubbing process. It’s advisable to start by removing the ash from the stove using a suitable tool or equipment. You can then wet the inner side of the stove, making it easier to remove any leftover ash and debris.
After wetting the stove, consider using a safe cleaning product like Bar Keeper’s Friend to loosen any stuck particles or residue. A soft brush or a brush drill attachment works well for scrubbing the inside of the stove, as it helps lift off stuck ash effectively without causing damage to the stove’s surface.
Rinsing the Solo Stove thoroughly with water is essential, as it washes away any remaining cleanser residue and loosened debris. However, be sure to turn the stove upside down or on its side to let it drain and dry properly.
Remember to keep your paragraphs short, engaging and easy to understand. Stick to a confident, knowledgeable, and clear tone whilst writing in the third person and in English.
Cleaning the Interior
Solo Stoves are known for their efficiency and ease of use, but regular cleaning and maintenance are crucial to keep them functioning correctly. The process of cleaning the interior of a Solo Stove consists of a few simple steps.
Begin by inspecting the stove for any signs of damage or wear and tear. If you notice any cracks, holes, or broken parts, it’s advisable to replace them before cleaning. Once you’ve assessed the stove, disassemble it, and set aside all removable parts.
To clean the ashes from the stove, you may use a shop vacuum, as recommended by Hiking Soul. This ensures that you thoroughly remove any remaining ash particles from the fire pit. Alternatively, you can use any suitable tool or equipment to eliminate the ash.
Next, wet the inner side of the Solo Stove and dust some Bar Keeper Friend inside it. This cleaning agent will help remove any stubborn residue. Use a soft brush drill attachment to scrub the interior gently, loosening any stuck ash pieces.
After scrubbing, rinse the Solo Stove thoroughly with water. It’s essential to let the stove dry completely before reassembling and using it again. This process will help you maintain your Solo Stove’s performance and longevity.
Remember that using the right wood for your Solo Stove can reduce the frequency of cleaning. Hardwoods like oak, pecan, hickory, and juniper ensure cleaner combustion and minimal residue. Seasoned wood, which has had moisture evaporated, is preferable for optimal cleaning and maintenance results.
Cleaning the Exterior
Cleaning the exterior of a Solo Stove is an essential step in ensuring its longevity and performance. Start by grabbing a soft cloth, mild dish soap, and warm water. Gently wipe down the exterior surfaces with the soapy water to remove any dirt or debris. This helps maintain the stove’s appearance and prevents any buildup that could affect its function.
For tougher stains, a scrub brush may be required. Use this brush with caution, as you do not want to scratch the surface of your Solo Stove. Effortlessly work on the stubborn spots until they are removed. Periodically rinse the brush to avoid reintroducing dirt onto the cleaned areas.
Once the exterior has been cleaned, consider polishing the metal surface to keep your Solo Stove looking brand new. A metal polish can be applied using a soft cloth, gently buffing the surface to bring out its shine. Ensure that you follow the instructions on the polish and avoid over-applying, as this can lead to a greasy residue.
By regularly cleaning and maintaining the exterior of your Solo Stove, you ensure that it stays looking pristine and operates efficiently. Remember to always handle your stove with care and use the appropriate tools for cleaning to avoid any damage.
How to Dry the Solo Stove
After cleaning your Solo Stove, it is crucial to properly dry it. Any remaining moisture can lead to rusting or damage. Following a few simple steps will ensure your Solo Stove is adequately dried and ready for its next use.
Start by turning your Solo Stove upside down or on its side. This allows any excess water to drain out of the stove quickly. While it is in this position, use a clean, dry cloth to wipe the exterior, ensuring no water droplets remain.
In addition to the exterior, pay attention to the ash pan and grate. These parts are essential for functionality, and any residual moisture may cause problems later on. Carefully remove these components and make sure they are thoroughly dried using a towel or cloth.
When you are confident that the exterior, ash pan, and grate are dry, proceed to the base and interior of the Solo Stove. Examine the interior surfaces, particularly where the air vents are located. Any remaining moisture can obstruct the air vents and affect performance, so use a cloth or towel to absorb any remaining dampness.
Lastly, let the Solo Stove sit in a well-ventilated area to air dry for a few hours. This extra measure ensures all moisture evaporates before storing your stove. Keeping your Solo Stove clean and maintained will extend its lifespan, allowing you to enjoy this outdoor cooking accessory for years to come.
Maintaining Your Solo Stove
Keeping your Solo Stove looking and functioning like new is essential for a great experience. Proper maintenance ensures its durability and efficiency. Here are a few tips to help you maintain your Solo Stove in optimal condition.
Firstly, after each use, it’s crucial to empty the ash from the fire pit. This prevents build-up over time, which can cause damage to your stove. Use a brush or a tool to gently remove ash and debris from the interior.
Next, deep cleaning is necessary from time to time. To do this, use a soft brush drill attachment along with Bar Keepers Friend to scrub off any residue stuck inside the stove. It’s essential to wet the inner side before brushing, as it eases the removal process.
Apart from cleaning, inspect your stove for any signs of damage or wear and tear regularly. If you notice any cracks, holes, or broken parts, consider replacing them to maintain your stove’s efficiency.
Lastly, storing the Solo Stove correctly is vital for preventing unnecessary damage. When not in use, keep the stove in a dry and safe location, protected from harsh elements or direct sunlight. Covering it with a high-quality cover or storing it indoors can help prolong its lifespan.
By following these simple maintenance tips, you can ensure that your Solo Stove stays in excellent condition and delivers an outstanding performance every time you use it.

Safety Tips
When cleaning your Solo Stove, it’s essential to prioritize safety to avoid any accidents or injuries. Here are a few safety precautions to consider:
Before starting the cleaning process, ensure that the stove has completely cooled down. Handling a hot stove can cause severe burns. Wait for at least a couple of hours after use before attempting to clean it.
Use gloves when cleaning your Solo Stove to protect your hands from potential cuts, scrapes, or exposure to cleaning agents. This is particularly important when using chemical cleaning solutions.
Always clean your stove on a stable, non-slip surface to prevent any accidental spills or toppling. If possible, choose a dedicated workspace or outdoor area for cleaning, away from children and pets.
During the cleaning process, avoid using harsh chemicals or abrasive tools that may damage the stove’s surface. Instead, opt for gentle cleaning agents, like a vinegar solution or Bar Keepers Friend, and use a soft brush drill attachment for thorough cleaning. Please refer to the manufacturer’s guidelines to ensure the cleaning products you choose are compatible with your stove.
To reduce the risk of inhaling fumes or dust particles, clean your stove in a well-ventilated area. When using chemical cleaning products, wearing a mask can further minimize inhalation risks.
Properly dispose of waste materials, like ash and used cleaning solutions, according to local regulations. Not only does this help protect the environment, but it also helps to maintain a clean and safe workspace.
By following these safety tips, you will ensure a smooth and accident-free experience when cleaning your Solo Stove.
Troubleshooting Common Issues
When it comes to cleaning your Solo Stove, there are some common issues you might encounter. Tackling these issues will ensure the longevity and efficiency of your stove.
One frequent problem is the buildup of ash and soot inside the stove. It’s essential to regularly remove ash to avoid clogging the air vents. A soft bristle brush helps loosen any stuck pieces of ash, and a portable vacuum makes it easier to clean the air vents.
Another issue is moisture and rust. Avoid allowing water to enter the stove as it can mix with ash, creating a cement-like substance that’s hard to clean. As mentioned by Hiking Soul, it’s crucial to prevent water from getting trapped inside the fire pit. To minimize rust, dry your stove thoroughly after cleaning and consider using a weather cover when it’s not in use.
When you notice stains and buildup on the outside of the stove, don’t worry. It’s normal for the stove to develop a patina over time. However, you can use a product like Bar Keepers Friend to clean the exterior, followed by thorough rinsing and drying.
Lastly, inspecting your stove for any signs of damage is essential. Regularly check for cracks, holes, or broken parts, as these might affect the stove’s performance. Replace damaged components before continuing with the cleaning process, as described by The Kitchenix.
By addressing these common issues, you can maintain the performance and lifespan of your Solo Stove.

Conclusion
In conclusion, it is essential to properly clean and maintain your Solo Stove for optimal performance and longevity. Start by letting the stove cool down completely after using it, as handling hot components can result in injuries.
Once cooled down, inspect the stove for any signs of damage or wear and tear, and replace any damaged parts if needed. Also, make sure to use the right type of wood, such as seasoned hardwoods or harder softwoods, to prevent excessive smoke and make cleaning easier.
Emptying ashes regularly and avoiding the use of damp wood can help keep the stove cleaner, resulting in less frequent and intensive cleaning. By following these simple maintenance steps, you can ensure that your Solo Stove remains a reliable and efficient source of heat during your outdoor adventures.
Get more information about cleaning supplies from Jesun!