
Conclusiones clave
- A crevice brush is defined by its head profile, not its material: flat, pointed, radial or angled heads each fit a different kind of gap.
- Stiff, short tufts reach into a seam and stay there; long soft bristles bend away from the surface and leave the gap untouched.
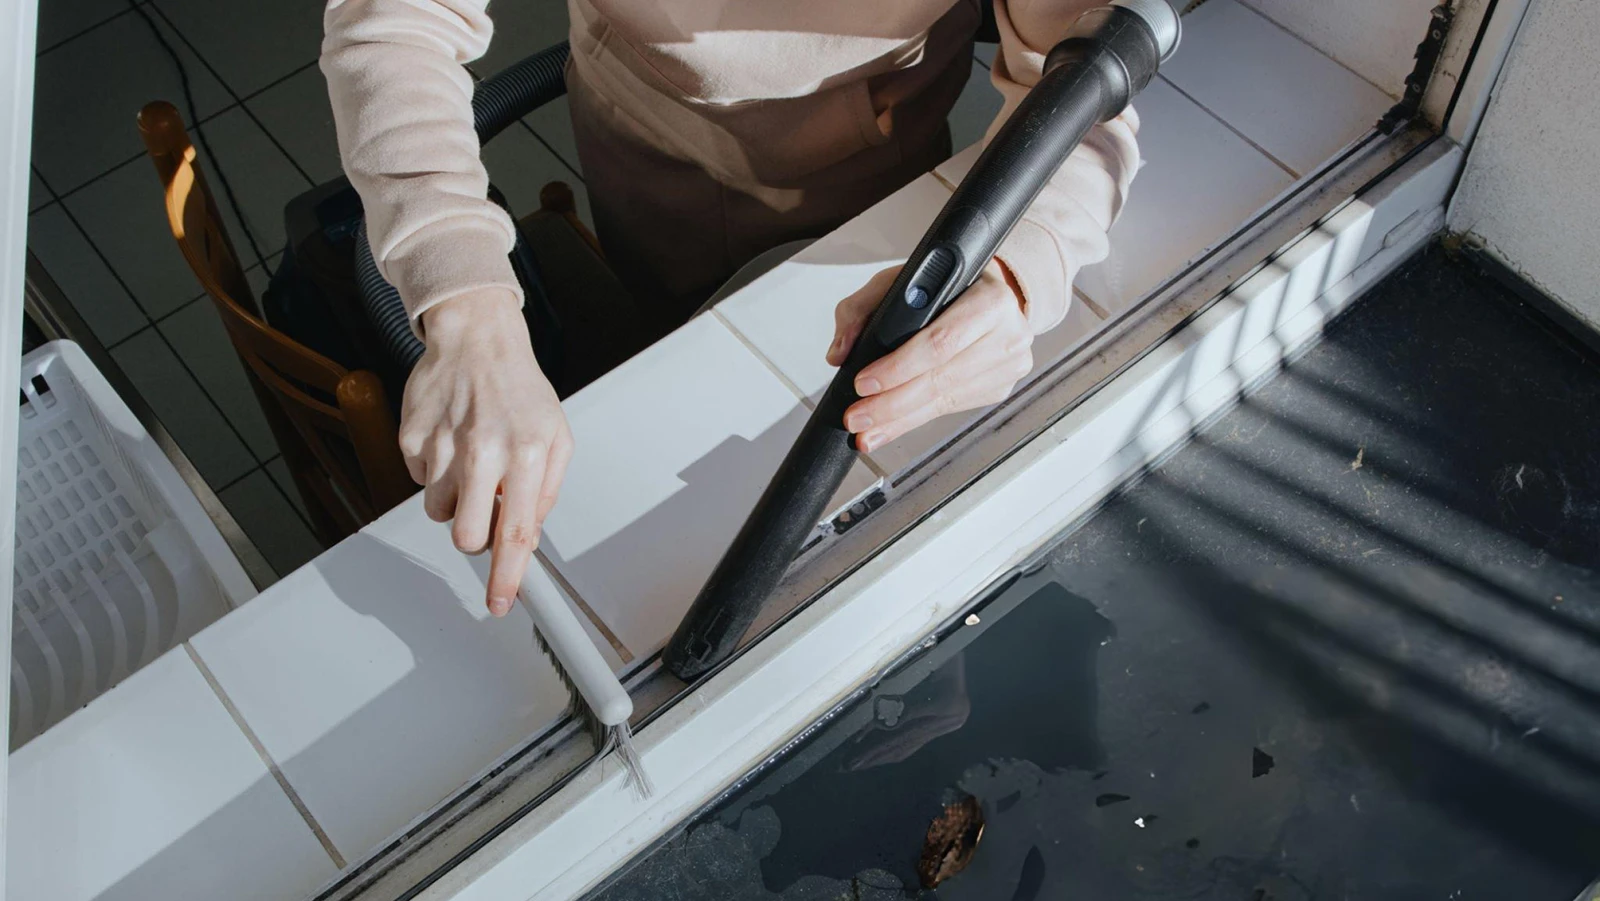
- The highest-value targets are sink edges, tap bases, tile grout, window tracks, appliance seals and the channel behind a toilet base.
- Thin heads break easily, so use light pressure and let a cleaning solution soften the residue first.
- Keep detail brushes dedicated to one zone, and replace them every 6–12 months as the tufts flatten.
Introducción
Cleaning crevices is the part of a room that a normal brush cannot do at all. The gap where a sink meets a countertop, the base of a tap, the line between two tiles, the track of a sliding window and the rubber seal around an appliance door are all narrow, deep and awkward. A wide brush passes straight over them, which is why a kitchen can look clean overall and still smell faintly of the residue sitting in a seam. A crevice brush solves that specific problem, and it solves it by geometry rather than by chemistry. The head is thin enough to enter the gap, and the bristles are short and stiff enough to stay in contact once it is there. For example, a 6 mm stiff tuft reaches the bottom of a grout recess that a soft 20 mm tuft never touches.
That design brief also explains the tool’s weaknesses. A thin head is fragile, so crevice brushes wear out faster than any other brush in the house and can snap if you force them into a gap. Consequently, the technique matters as much as the tool, and the sections below cover both. In addition, the hygiene rules are stricter than for a floor brush, because detail brushes work in bathrooms and kitchens where cross-contamination between zones is easy to overlook. We manufacture detail brushes in several head profiles, so the comparisons here come from our own product testing. The kitchen brushes that most often need this technique are covered in kitchen cleaning brushes, and the bathroom equivalent in types of toilet brushes.
This guide covers head shapes, bristle materials, the six places where a crevice brush earns its place in a kit, and the handling habits that stop a thin head from breaking. Notably, the tool itself costs very little, so the real decision is which profiles to keep on hand rather than how much to spend. In addition, a set with interchangeable heads covers all four profiles for less than two single brushes.
What Counts as a Crevice Brush
A crevice brush is any brush whose head is narrower than the gap it is meant to clean, with tufts short enough that they do not fold over under light pressure. That definition rules out most brushes people try to substitute. A dish brush has a head too wide to enter a seam, so only the outermost bristles make contact. A toothbrush is narrow enough but too soft and too long in the tuft to apply pressure along a grout line. A cotton swab fits the gap but cannot agitate anything, and it leaves fibres behind. For example, a grout line cleaned with a soft toothbrush will look marginally better and still hold the soil that caused the discolouration.
The practical specification is short, stiff, narrow. Tuft length matters most, because a long tuft bends away from the surface the moment you press, which is exactly when you need contact. In our experience, a 6 to 10 mm tuft on a narrow head cleans a grout line faster than a soft brush with 20 mm tufts, and it lasts longer because the tufts do not splay. Head width then decides which gaps are reachable at all. For a window track you want a flat profile, while a tap base needs a pointed or angled head that can follow a curve. Consequently, a flat head alone will leave the curved seams untouched.

JESUN 360 Degree Rotated Detail Brush (LX-10)
PP and TPR head on an ABS handle, 19.5×24 cm, 0.082 kg, with a head that rotates to follow a seam. The profile we recommend for window tracks, frame edges and the join where a floor meets a wall.
| Head profile | Forma | Fits | Watch out for |
|---|---|---|---|
| Departamento | Straight narrow strip | Grout lines, window tracks, flat seams | Missing curved corners |
| Pointed | Tapered tip, single tuft cluster | Tap bases, corners, screw heads | Bending the tip under pressure |
| Radial | Tufts around a thin shaft | Drain surrounds, bottle necks, tubes | Wear at the widest point |
| Angled | Head set at 30–45 degrees | Under rims, behind fixtures | Reaching the far end of a long seam |
Head Shapes: Flat, Pointed, Radial and Angled
The flat head is the general-purpose profile and the one to buy first. It slides along a straight seam, keeps its whole width in contact, and works equally well on a grout line, a window track or the join between a worktop and a wall. Its limitation is corners, where a straight edge simply cannot follow the change of direction. Consequently, most kits pair a flat head with something narrower. In our testing, a flat head with stiff short tufts removed a season of grout discolouration in a few passes, while softer alternatives needed far longer and left a visible grey line behind.
The pointed head handles corners and small fittings. Its tapered tip reaches around a tap base, into the gap beside a screw head and along the inside of a frame, where a flat strip cannot go. The radial head is different again: tufts arranged around a thin shaft clean in every direction at once, which suits the inside of a drain surround or a bottle neck. The angled head trades reach for access, letting you work under a rim or behind a fixture without tilting your wrist. Importantly, no single profile covers all four jobs, and the cheapest way to cover them is a set with interchangeable heads rather than four separate brushes. Similarly, a radial head earns its place only if you clean drain surrounds or bottle necks regularly.
Bristle Materials for Detail Work
Material choice matters less than head profile for crevice work, but it still decides how long a brush survives. Nylon is the stiffest common option and the best for grout and mineral staining, though it discolours and degrades under repeated bleach exposure. Polypropylene is softer and cheaper, which suits light detail work around appliances. TPR rubber blades rinse clean and resist splaying, which makes them a good choice in a wet bathroom. Silicone is the most hygienic option because it is non-porous and dries fast, and it handles bleach and acid descalers without degrading. Natural fibres biodegrade but absorb water and smell if they stay wet. However, the handle is usually the part that fails first, which is why the neck design matters more than the bristle.
Handle material is the second half of the decision, and it is usually the part that fails. A wooden handle is comfortable and looks better, but it swells and splits if it is left in water. Plastic handles tolerate soaking and cost less, though a thin plastic neck can snap where the head meets the handle. In our experience, the failure point is almost always the neck rather than the bristles, so look for a moulded one-piece head or a reinforced joint. That single detail roughly doubled the useful life of a detail brush in our testing, and it costs nothing extra to specify.
Six Places Crevice Brushes Matter Most
These are the locations where a crevice brush changes the outcome rather than just making the job slightly easier. If you clean only these six, the tool has paid for itself.
- Sink and countertop seam: the silicone bead traps food and water, and it is the most common source of a persistent kitchen smell.
- Tap base and handle joint: limescale builds in the gap and pushes the fitting, which eventually causes a drip.
- Tile grout lines: the surface soil that makes a floor look dirty sits in the recess, not on the tile face.
- Window and door tracks: grit and pollen collect in the channel and grind against the sliding mechanism.
- Appliance door seals: fridge and washing machine gaskets hold residue that a wipe cannot reach, and it moulds.
- Behind a toilet base: the channel between the pedestal and the floor collects splash that never dries fully.
Each of these locations has the same characteristic: a narrow recess where moisture stays longer than it does on the surrounding surface. That is precisely why the soil there is harder to remove and why the tool needs to be narrow and stiff rather than large and soft. Meanwhile, the same logic explains why a general-purpose brush will never substitute, no matter how often you use it. Notably, the same logic explains why window tracks and appliance seals need two different head profiles.
What to Look For When You Buy a Crevice Brush
If you are choosing a crevice brush rather than reading about one, four specifications decide whether it will survive the job. Handle length should put your fingers clear of the gap without levering the head, and most useful detail brushes sit between 19 and 25 cm overall. Bristles should be stiff and short — if the tufts are longer than about a centimetre, the brush will agitate rather than scrub. The neck should be moulded in one piece or visibly reinforced, because that is where cheap detail brushes snap. Finally, check the profile against the gap you actually have: a flat head for grout and window tracks, a pointed or rotating head for tap bases and corners. Buying a set with interchangeable heads covers all four profiles for less than two single brushes, which is why most of the kits we ship are multi-head.
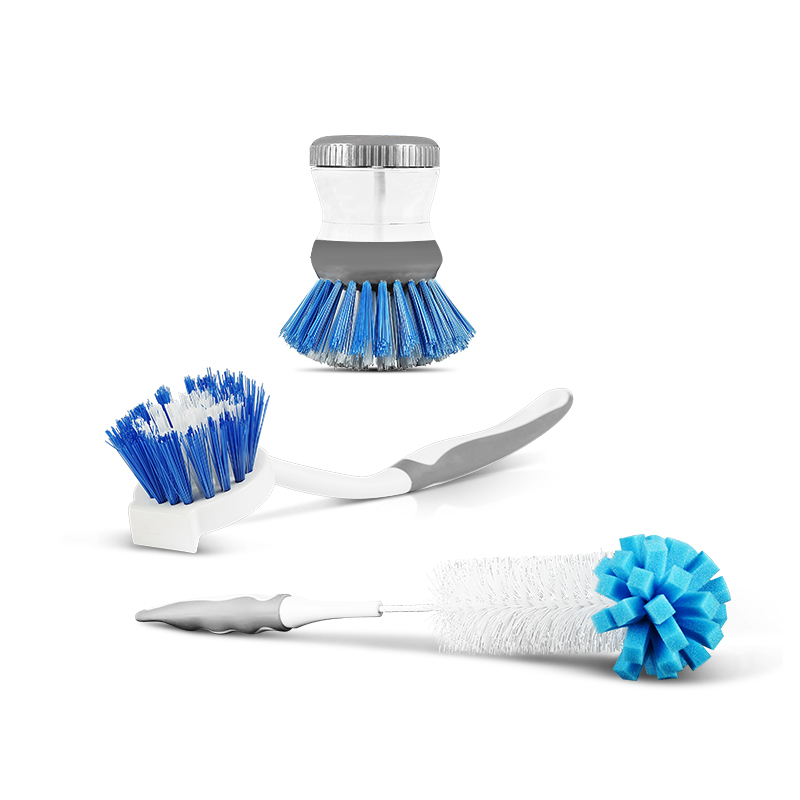
JESUN Kitchen Cleaning Brush Set (ALM11)
A multi-head PP, PET and sponge set on a 36×8 cm handle, 0.046 kg per brush. Includes the narrow detail head we recommend for sink seams, tap bases and appliance seals.
Crevice Brushes vs Toothbrushes and Swabs
The two most common substitutes are the old toothbrush and the cotton swab, and both have a place. A toothbrush is genuinely useful for a large area of grout, because it is cheap, soft and wide enough to cover a line quickly. Its weakness is that the tufts are long and soft, so it agitates rather than scrubs, and it wears out quickly when used on abrasive surfaces. A cotton swab reaches the smallest gaps and works well for a one-off clean around a fitting, but it cannot apply pressure and it leaves fibres behind in a wet seam. Neither is a substitute for a stiff, short-tufted detail brush on a stubborn line.
Where a toothbrush does earn its keep is in disposable form, on surfaces you would rather not carry back to a shared brush. In a bathroom, using a dedicated tool and then discarding it removes the cross-contamination question entirely, which is why disposable detail brushes are common in hospitality cleaning. For everyday household use, however, a reusable brush with a stiff head costs less over a year and cleans better. In our experience, the switch from toothbrushes to a proper detail brush is the single change that shortens bathroom cleaning time the most. In our experience, a stiff detail brush also reaches the far end of a window track that a toothbrush cannot.
Technique: Using One Without Breaking It
Technique is what separates a detail brush that lasts a year from one that lasts a month. Start by wetting the seam and applying a cleaning solution, then give it a minute to soften the residue before you touch it with bristles. That single step reduces the pressure you need, and pressure is what breaks thin heads. Work along the line rather than into it, keeping the head flat against the surface and letting the bristle tips do the work. If the brush stops moving freely, the gap is full of residue and needs flushing rather than more force. For example, a grout line that resists a light pass usually needs a descaler soak, not a harder scrub.
Two habits prevent most breakages. First, never lever the head sideways to pry out debris, because the neck is the weakest part of the tool and it fails in shear. Second, rinse the head frequently while you work, since a brush packed with soil stops cutting and encourages you to press harder. Notably, the same rule applies to the surface: a stiff brush dragged dry across a glazed tile can leave fine scratches, so keep the seam wet throughout. In our experience, following these three rules has kept detail brushes in service for well over a year of weekly use. As a result, the cheapest way to extend a detail brush’s life is patience rather than a better brush.
Cleaning and Replacing Detail Brushes
Crevice brushes need more care than their size suggests, because they work in the damp recesses where bacteria accumulate fastest. Rinse the head thoroughly after every use, shake out the water and stand the brush head-up to dry, since a detail brush lying flat on a sink will still be wet the next morning. Once a week, wash the head in hot soapy water and let it dry completely. Public health guidance is that cleaning with soap and water removes most germs in ordinary household settings, and disinfection is reserved for when someone is sick or a surface has been contaminated (CDC, 2025). That order keeps the routine short and effective.
Replacement is driven by tuft condition rather than appearance. A detail brush is finished when the tufts flatten and stop reaching the bottom of the recess, when the head develops a permanent bend, or when the neck shows a crack. In practice that is every six to twelve months for household use and considerably less in commercial cleaning. In addition, replace any brush used around a toilet or a bin after an illness in the household, and never move a bathroom detail brush into the kitchen. An NSF International study reported by Consumer Reports found coliform bacteria on 75% of sampled household sponges and rags, and extension services make the same point about brushes that are not washed and dried between uses (Consumer Reports, 2025). That said, a detail brush used only in the kitchen carries a much lower risk than one that moves between rooms.
Preguntas frecuentes
What is a crevice cleaning brush used for?
It cleans the narrow recesses a normal brush cannot enter: the seam where a sink meets a worktop, tap bases, tile grout lines, window tracks, appliance door seals and the channel behind a toilet base. Its thin, stiff head keeps contact inside a gap where a wide brush simply passes over.
What is the best bristle stiffness for a crevice brush?
Stiff and short. Long soft tufts bend away from the surface under light pressure, which is exactly when you need contact, so a 6 to 10 mm stiff tuft cleans a grout line faster and lasts longer in our testing. Softer bristles suit light detail work around appliance seals and delicate finishes.
Can I just use an old toothbrush instead?
For a large area of grout, a toothbrush works reasonably well because it is cheap and wide. For a stubborn line, it does not: the tufts are long and soft, so it agitates rather than scrubs. A proper detail brush applies more pressure at the tip and lasts longer.
How do I stop crevice brushes from breaking?
Soak the seam first so the residue softens, then work along the line with light pressure and keep the head flat. Never lever the head sideways to pry out debris, because the neck is the weakest point and fails in shear. Rinse the head often so it keeps cutting.
How often should a crevice brush be replaced?
Every six to twelve months in a household, and sooner in commercial cleaning. Replace it when the tufts flatten and stop reaching the bottom of the recess, when the head takes a permanent bend, or when the neck cracks. Replace after illness, and never move one between the bathroom and the kitchen.
Sourcing detail brushes for your range?
We manufacture crevice and detail brushes in flat, pointed, radial and angled profiles, in nylon, TPR and silicone, with wooden or moulded handles and OEM or ODM support from low MOQs.
Request Wholesale Pricing →Conclusión
Crevice brushes are small, cheap and disproportionately useful, because they reach the seams where residue actually accumulates and where a wide brush has no effect at all. The head profile matters more than the material: flat for grout and window tracks, pointed for corners and fittings, radial for tubes and drain surrounds, angled for rims and fixtures. Stiff short tufts outperform soft long ones, and a reinforced neck is the detail that decides whether the tool lasts a month or a year. Meanwhile, the handling rules are simple: soften the residue first, work along the line with light pressure, rinse often and dry the head standing up. That said, none of it works if a single brush is carried between the bathroom and the kitchen, so keep detail brushes dedicated to one zone.
We build detail brushes in all four head profiles and a range of bristle materials, and we are happy to help you assemble the right set for your market.
Referencias
- US Centers for Disease Control and Prevention — “When and How to Clean and Disinfect Your Home.” cdc.gov/hygiene/about/when-and-how-to-clean-and-disinfect-your-home.html
- Consumer Reports — “Household Cleaning Tools: How to Clean and When to Replace.” consumerreports.org/home-garden/cleaning/how-to-clean-and-when-to-replace-household-cleaning-tools
- University of Illinois Extension — “A guide to keeping your sponges, dish rags and scrub brushes clean.” extension.illinois.edu/blogs/simply-nutritious-quick-and-delicious
- Clemson University Home & Garden Information Center — “Kitchen Hygiene: Let’s Talk About That Sponge!” hgic.clemson.edu/factsheet/kitchen-hygiene-lets-talk-about-that-sponge
This guide was written by the JESUN Cleaning Tools Team and reviewed by our product engineering group. You can read more about us o contact our team with questions about detail brush specifications.
Continue Learning
- Top 10 Tools to Clean Shower Grout — the grout-specific tool list, in more depth.
- How to Clean a Duster — the other small tool that needs its own routine.
- Brush catalog — detail, kitchen, bathroom and floor brushes in one place.




 Spanish
 English
 Russian
 Arabic